Ditch the data you don’t need
Cut storage costs and reduce risk with data minimization.
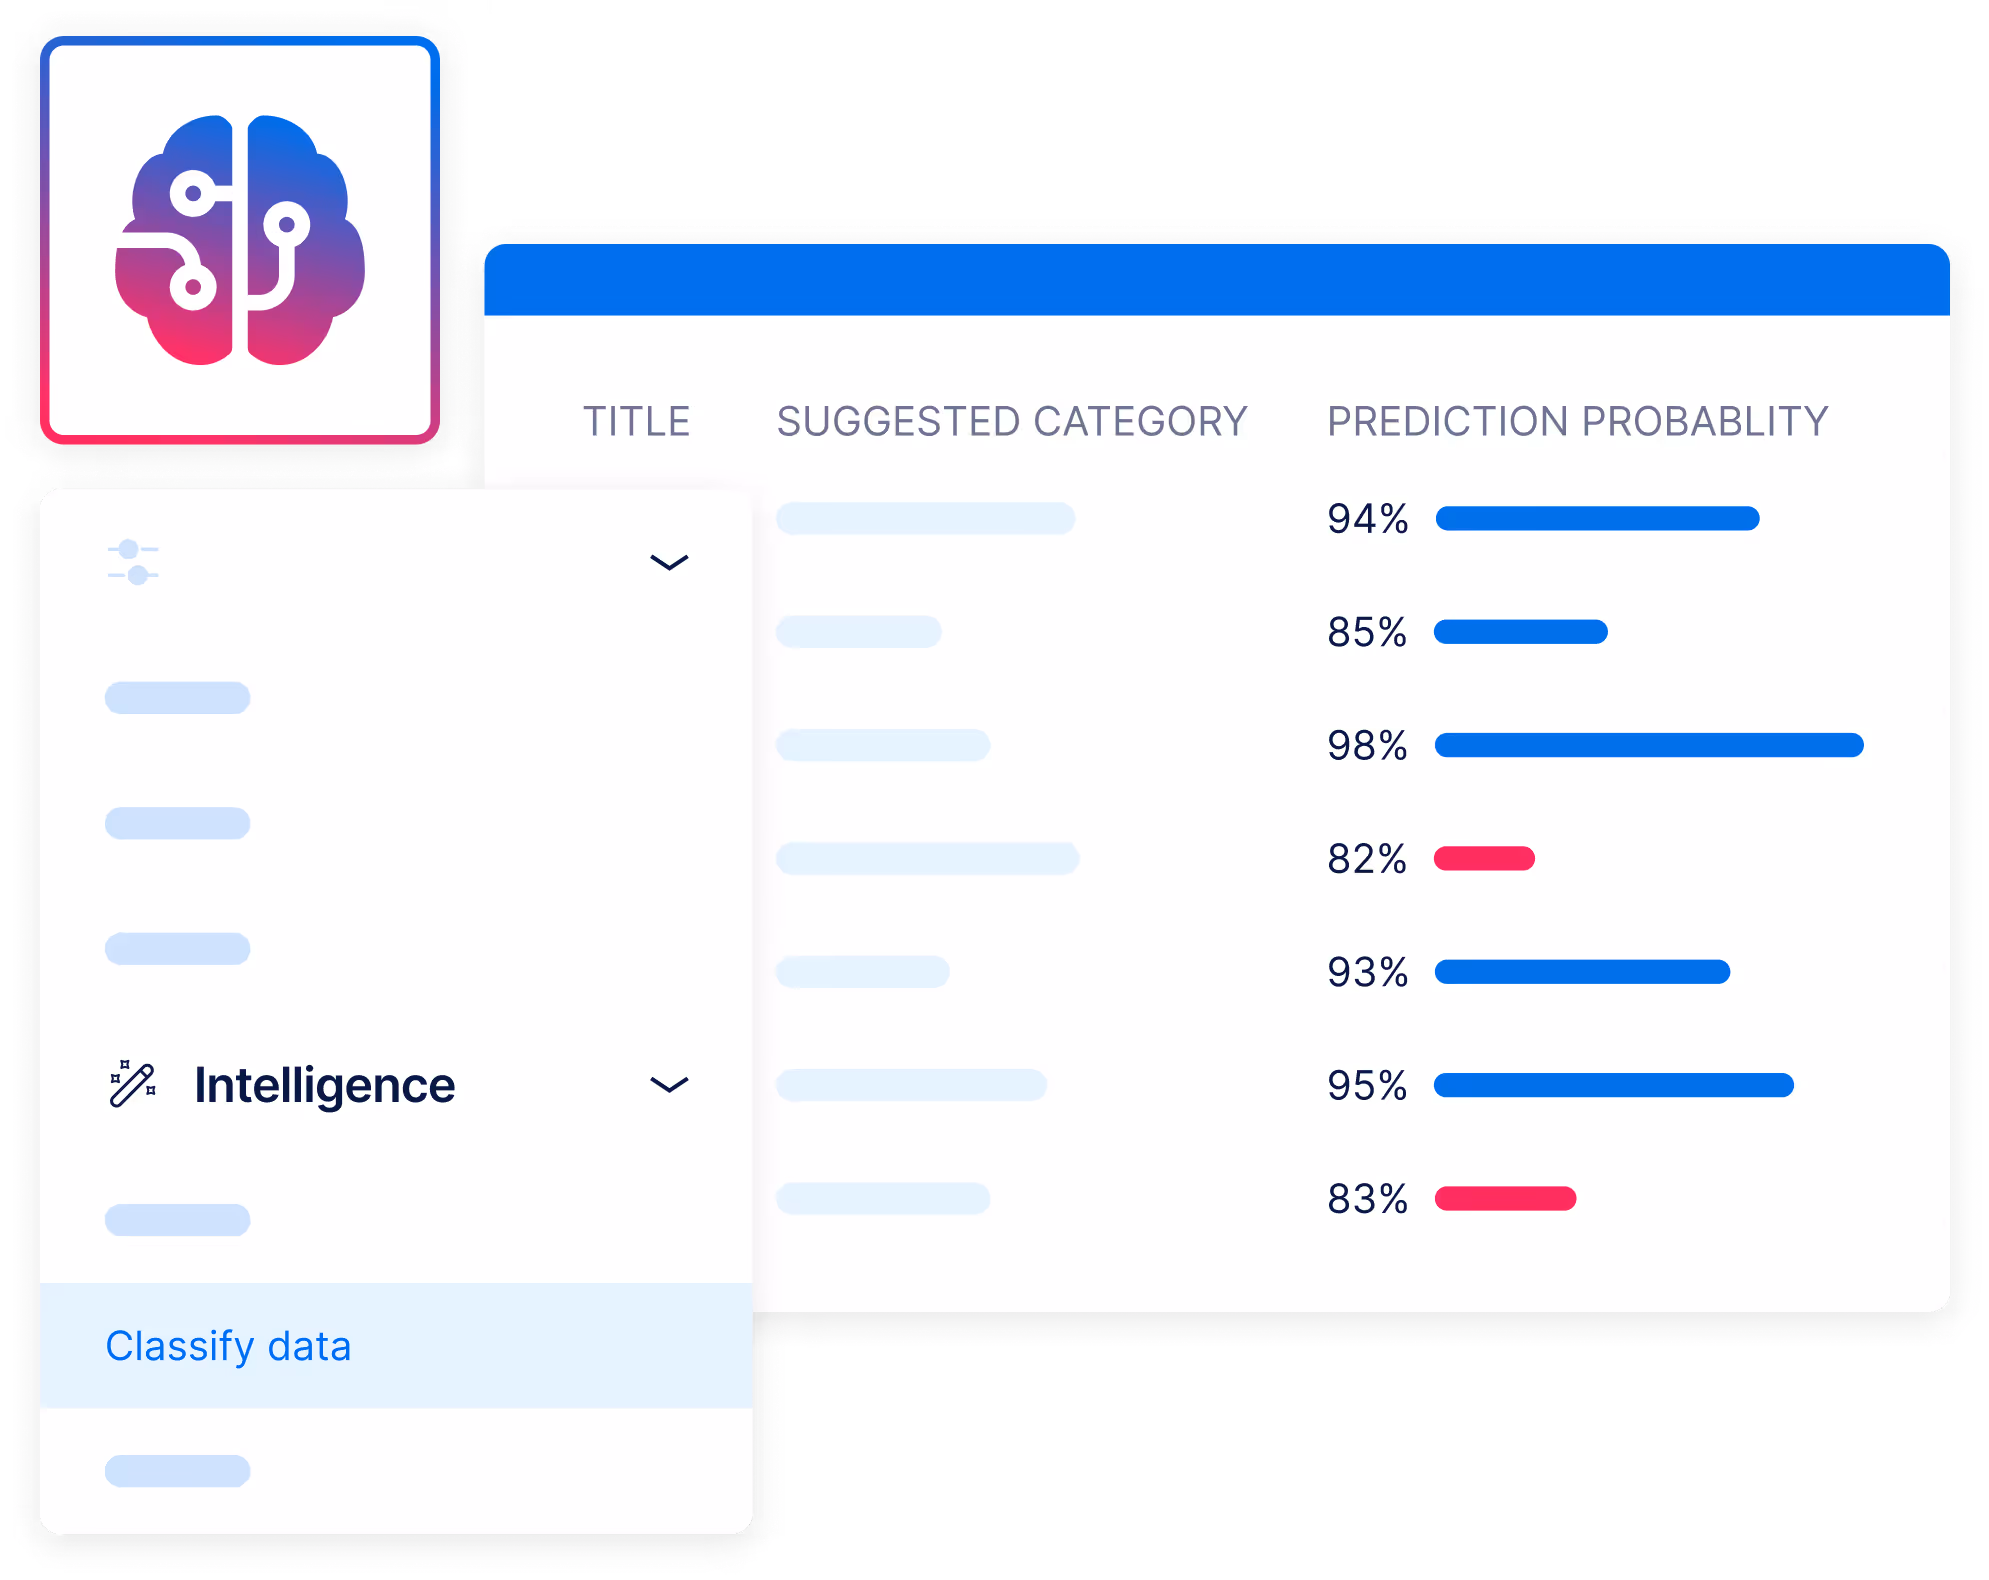
Automate data minimization
AI data classification and custom retention schedules make proactive data minimization simple and streamlined. Automatically identify and dispose of ROT data, eliminating human error and ensuring regulatory compliance.
Dispose of more, save more
Drowning in public disclosure requests, one city faced soaring admin costs. With RecordPoint, they streamlined response times and saved millions in admin costs.
Easily delegate and execute data disposal
Empower the right users with the right access to manage data at scale. Use Classification Intelligence, or create custom rules, to determine when data should be disposed, then allow specific users to approve of disposal, in line with your policies and regulatory requirements.
.avif)
Safeguard the data you keep
With less data to maintain, protecting the information you retain is easier.
- Intelligence Signaling automatically identifies data with PII and PCI
- Enterprise-level reporting ensures you know what’s happening with your data
- Track data authenticity and provenance to protect your organization in legal matters or audits
.avif)
Discover all the capabilities in our unified platform
Data discovery and classification
Stop guessing where your data lives. Unlock total visibility across your entire data estate.
Data lifecycle management
Ditch the manual effort. Automatically manage data from creation to disposal.
Risk detection and reporting
Identifying data risk is hard. Make it easy with real-time insights and risk reduction tools.